5 Steps to Pear Planting Success
- Choose an open, sunny position sheltered from strong winds for your pear tree. Pears are partially self-fertile.
- Prepare your soil with organic matter like compost and sheep pellets.
- Add a layer of citrus and fruit mix to plant into. In New Zealand winter is the optimum time to plant pear trees.
- Feed your pears in spring and summer to encourage maximum flowering and fruiting.
- Mulch and water well, particularly over the warmer months.
Follow our full guide below to a bumper crop of homegrown pears.
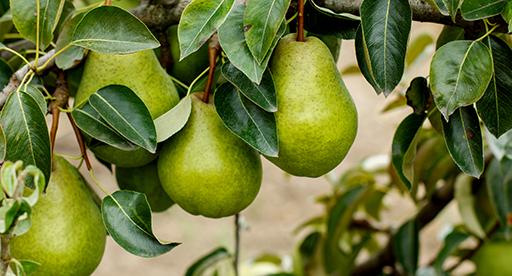
There are two types of pear: the European varieties, with their rich, buttery flavour and traditional ‘pear shape’, and the Asian pears, from the same family, but more rounded, crunchier and with juicer flesh. Whether you create your own mini-orchard, or choose to grow a tree in a pot, pear trees are fun to grow and can provide years of fresh, juicy homegrown fruit.
Prepare
Choose an open, sunny position for your pear tree. It is a good idea to find out how big the tree is going to grow to ensure it will have enough room. Although pears can grow throughout New Zealand the flowers are susceptible to frosts and severe weather. The southern regions may not have success with pears, unless a very hardy rootstock is planted. They flower earlier than apples, so check conditions in the area and when the cold weather finishes after winter. The roots of the tree enjoy a sunny position sheltered from strong winds. They tolerate a wide range of soil conditions and wetter conditions than apples.
Refer to our Planting Calendar.
Plant
Like building a house a good foundation is the key to success in your garden. The better the soil, the better your plants will grow. If you are starting with an existing garden bed dig in organic matter like Tui Sheep Pellets and Tui Compost to your soil. Then you can add a layer of Tui Garden Mix.
The best times to plant are early in the morning or late in the day, so the plants aren’t exposed to the hot sun straight away. Always water plants well before and after planting.
Planting in garden beds
• Water plants thoroughly before planting and allow to drain.
• Dig a hole, approximately twice the depth and width of the root ball of your plant.
• Partly fill the hole with Tui Garden Mix.
• Fill a bucket with water and add two capfuls of Tui Organic Seaweed Plant Tonic, this promotes strong root growth and reduces transplant shock.
• Place the tree (still in its bag) in the bucket of Tui Organic Seaweed Plant Tonic and soak for a few minutes until bubbles stop appearing. Remove from the bucket.
• Remove the tree from its bag or container and then gently loosen the root ball of the tree.
• Place the tree in the hole.
• Fill the hole with Tui Garden Mix, ensuring the tree is no deeper than it was in the bag or container.
• Press soil firmly around the tree.
• It is a good idea to stake when planting, as citrus don't like having their roots disturbed - this will help support the tree.
• Water your tree well.
In the first year after planting your pear tree, remove any fruit that sets. This allows the tree to establish itself and encourages better fruiting in the following seasons.
Nourish
Replenishing nutrients used by your pear tree ensures they will grow to their full potential, producing abundant and juicy crops. Use Tui NovaTec Premium fertiliser to feed your pear tree planted in the garden in spring and summer. Tui NovaTec Premium fertiliser is an all-purpose compound fertiliser so your pear tree receives a balance and even spread of all essential nutrients for maximum fruiting and flowering.
Don't forget to water your pear tree too - especially over the warm summer months to ensure you have juicy fruit.
Well watered, well nourished pear trees will have a better chance of keeping insect pests and diseases at bay.
Recipe Inspiration:
Once you've harvested your pears, try this recipe for Feijoa, Pear and Ginger Cake to enjoy your crop.
A central-leader pruning system works best. Be sure to remove all diseased, damaged or dead wood. Remove any branches that are crossing or rubbing. Cut away any branches that are growing back into the centre of the tree. Thin over crowded area of your tree’s canopy and shape according to its variety. See our Fruit Tree Pruning Guide for more information.
- Jan
- Feb
- Mar
- Apr
- May
- Jun
- Jul
- Aug
- Sep
- Oct
- Nov
- Dec
- Harvest in 2-4 years